What I had hanging iny kitchen "Before":
And our new Magnetic Chalkboard "After":
With my son starting kindergarten (I know...what!) this week and the past few days in the 60s, I am all in super amped up back-to-school and organization mode. Just completed this DIY project (that was kind of hanging over my head for a while) to help bring a little more aesthetically pleasing organization to my kitchen slash life....I love the idea of a magnetic chalkboard because it serves the double purpose of being able to hang all.the.things that clutter my
life kitchen - invitations, calendars, pictures, Landon's beautiful art work, school notices/reminders with magnets, as well as give you the ability to write your own notes, to-do's, quotes, lists, reminders, or even full fledge calendar with easily erasable chalk. With a stainless steel fridge, I had no place to hang all these things, and looking to buy my own in the large size I wanted was hundreds of dollars! SO I made my own and it was really easy enough for anyone to do. Other ideas of places to hang other than your kitchen: above a child's desk, in a home office, or play room. Total cost of making this in this large size was about $45
Here's What You Need:
- a Frame. I bought my frame from Hobby Lobby (their backless frames are 50% off every week, so this one was normally $70 that I got for $35). Mine is a 24x 36":
- Sheet Metal. I bought mine from Home Depot. They actually carried sheet metal in exactly my frame's size so it worked out, but they will cut for free if you ask them to nicely in their tool rental section :)
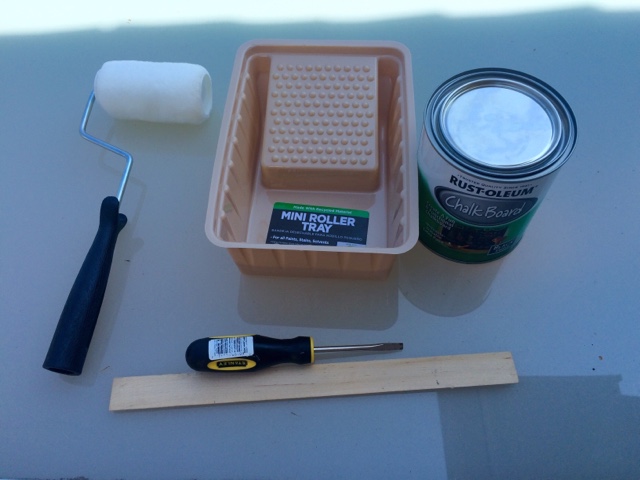
- Chalkboard Paint. Because the magnets will work great against the metal you don't need a magnetic primer. Chalkboard paint can be found right in the paint section at Home Depot or Lowes.
- Roller/pan. I used the small one, any size will really do. Just don't use a paintbrush. The roller allows for the most even-tone coverage.
- Optional wood backing. If you buy a backless frame like I did you might want to get some additional wood backing for more support. You can put the painted sheet metal in without it, but the guys at Home Depot helped cut me down an additional thin wood backing to provide a little more support/baking, which I am really happy with. If you buy a frame that already had a backing you can use that. You will also need Bracket clips or nails to nail in the backing.
- Mount. Any mounting hardware will work.
Directions:
1. Paint your sheet metal. Wait for each coat to dry completely before painting another coat. I did a total of 4-5 coats.
This picture above is what it looked like after the first coat- even after the second it will still have some metal showing through, make sure you let dry completely before you start your next coat and do a good 4-5 coats.
2. Cut down sheet metal to size (can have them do this for you at Home Depot), and insert into frame.
3. If using a backless frame, cut down wood backing to size and nail in to secure into frame.
4. Hang mount according to package directions.
5. Hang up your new magnetic chalkboard and de-clutter your life and get organized for the school year!


Love it! Hobby Lobby for the win!
ReplyDeleteI JUST discovered Hobby Lobby! Now I am finding my car turn in there way more than is normal or that I have time for. And always feel like I just came out of church O:)
DeleteAhhh so pretty!! What a great idea
ReplyDelete